Welcome Rider
The entire Atlantis MOTO team, we want to thank you for choosing and trusting our devices to protect your motorcycle. We are sure that enjoying your motorcycle will change from now on. Not only for being calmer by having your motorcycle more protected and connected with you at all times.
We want to offer you a series of practical tools designed for all bikers, which make your Atlantis MOTO much more than a GPS locator for motorcycles. Follow us on our social networks and don’t miss a thing, we periodically release updates that add new features and tools designed by and for bikers.
Let's go!
What Atlantis MOTO system do you have?
Click on the image of your AtlantisMOTO system to access the installation and user manual.
Atlantis MOTO MAX installation
IMPORTANT: Before installing the device, you will need to activate it on your mobile so that you can do tests during the installation.
To activate it, create your account and register your device in the AtlantisMOTO APP 24 hours before installing it.
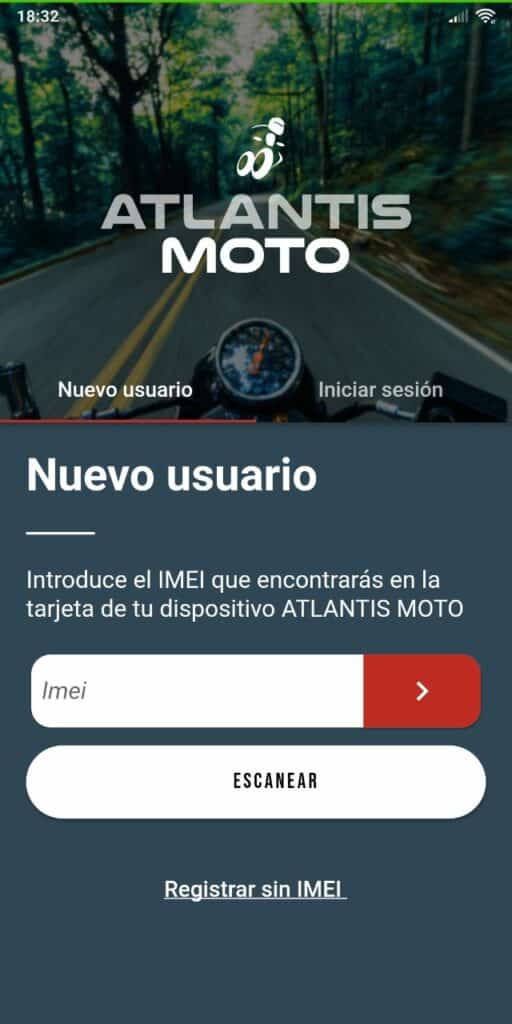
In the APP, Start the registration by clicking on « New user » and enter the IMEI number , which you will find on the box of your AtlantisMOTO.
Find a location to hide your Atlantis Moto MAX
Before starting the installation of your Atlantis Moto MAX , you will need to find a space in which to place your Atlantis Moto MAX unit . In the image below, arrows indicate possible locations for your Atlantis Moto MAX device.

You must keep in mind that the device has internally integrated GPS and GSM antennas. Decide the location of the device respecting the following indications:
- The side of the LEDS cannot be covered by any metal part.
- The side of the LEDS must face the sky, the device supports lateral tilt.
- It is not advisable to install it upside down (with the LEDs facing the ground) as it reduces the quality of satellite reception and may show a greater error in the location of the motorcycle.
- Do not place the device outdoors or where it may be flooded .
- Do not place the device near switchboards or management units (separate it at least 10 cm).
- Do not leave the device loose without any type of fastening (adhesive and/or zip ties).
- If possible, it is recommended that the device is fixed on a part of the chassis .
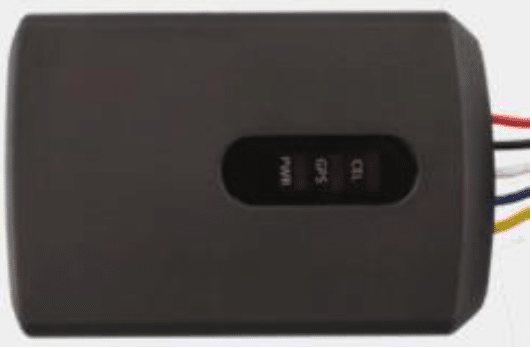
This side of the device must face the sky and must not be covered by any metal parts
Once you are clear about the final location of your Atlantis MOTO, you will have to make three basic connections. You will need a Multimeter (Tester) to check the connections .
Do not carry out the checks with a test lamp or a light bulb socket, as this can cause serious errors in the electrical installation of your motorcycle.
Once you are clear about the final location of your Atlantis MOTO, you will have to make three basic connections. You will need a Multimeter (Tester) to check the connections .
This is the connection diagram for your AtlantisMOTO MAX
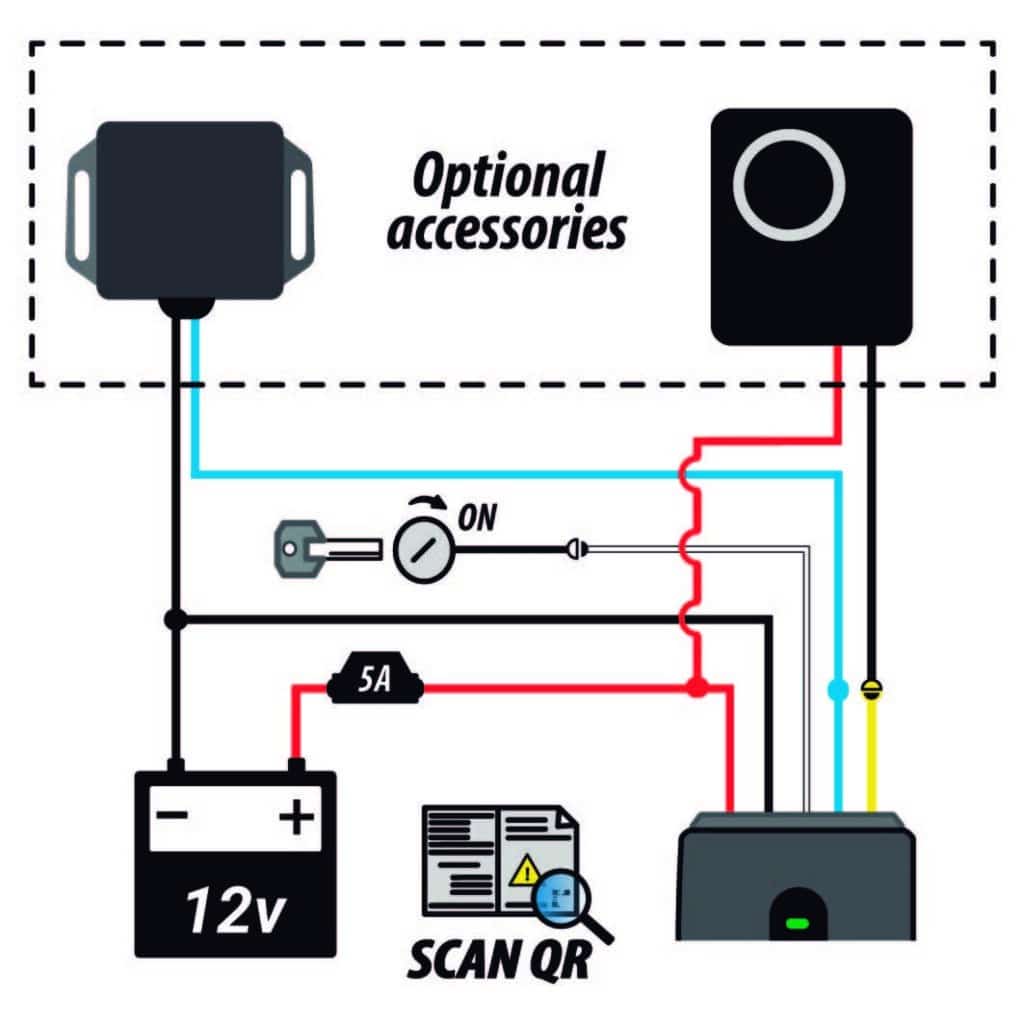
- The length of the cables supplied is based on the average measurement for installation on any motorcycle.
- You can cut or lengthen the cables as needed for your installation.
- Solder and insulate all connections you make.
- Use a cover similar to that of your motorcycle’s electrical installation to hide the installation of your Atlantis MOTO MAX.
- Use terminals to connect the cables to the battery posts.
- RED Wire – This wire must be connected to direct positive
The direct positive signal is one that remains constant at all times.
Do not cut or remove the fuse holder that comes pre-installed on the red wire.
- Black Wire – This wire must be connected to negative
- White wire – This wire must be connected to positive after contact (ACC)
The positive contact is usually found on one of the two cables of your motorcycle’s accessory sockets. You can also find it on one of the two wires of the parking light bulb or the rear license plate holder.
ATTENTION:
Once the installation is complete, to start the system for the first time, you must turn on the motorcycle’s ignition. This will power up the system and begin the subscription activation process.
As part of the verification process, if the siren is installed, your AtlantisMOTO MAX may sound for 5 seconds when you turn on the ignition, then stop automatically.
Are you going to install any accessories?
What accessory are you going to install?
Siren Installation
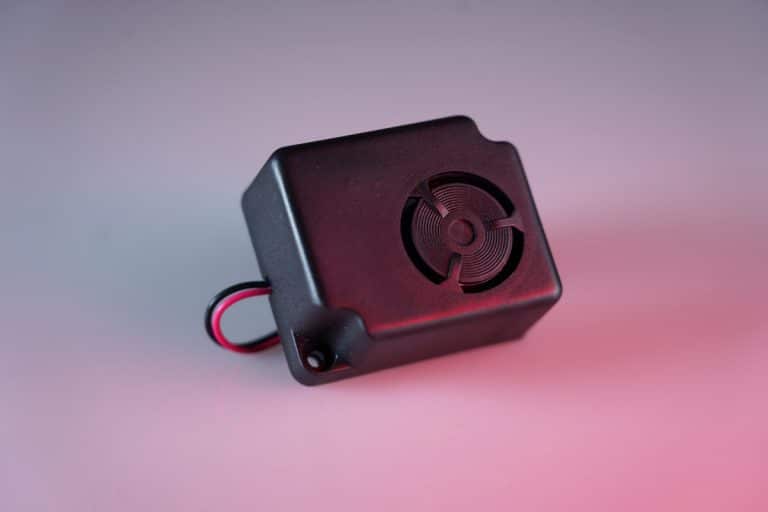
The siren connects to your Atlantis Moto MAX system via two cables. You can cut or lengthen the cables as needed for your installation.
- Black siren wire: Connects to the yellow wire of your Atlantis Moto MAX system
- Red siren wire: Connects to the red wire of your Atlantis Moto MAX system.
Place the siren taking into account the following points:
· Move it as far away as possible from the Atlantis Moto MAX system (50cm min)
· Avoid having any contact with water.
· Do not leave the device loose without any type of fastening (adhesive and/or zip ties)
ATTENTION:
Once the installation is complete, to start the system for the first time, you must turn on the motorcycle’s ignition. This will power up the system and begin the subscription activation process.
As part of the verification process, if the siren is installed, your AtlantisMOTO MAX may sound for 5 seconds when you turn on the ignition, then stop automatically.
Are you going to install any more accessories?
Fall Sensor Installation
The fall detection module connects to your Atlantis MOTO MAX system via two cables:
- Blue sensor wire: Connect with the Blue cable of your Atlantis Moto MAX.
- Black sensor wire: Connect to battery negative.(ground)
The final placement of the fall sensor on the motorcycle varies depending on the module you have chosen at the time of your purchase, which can be 45º or 60º. In both cases it must ALWAYS be located on the imaginary central axis of the motorcycle. Otherwise the sensor may suffer tilt variations, causing it to not detect a fall.
45º Sensor
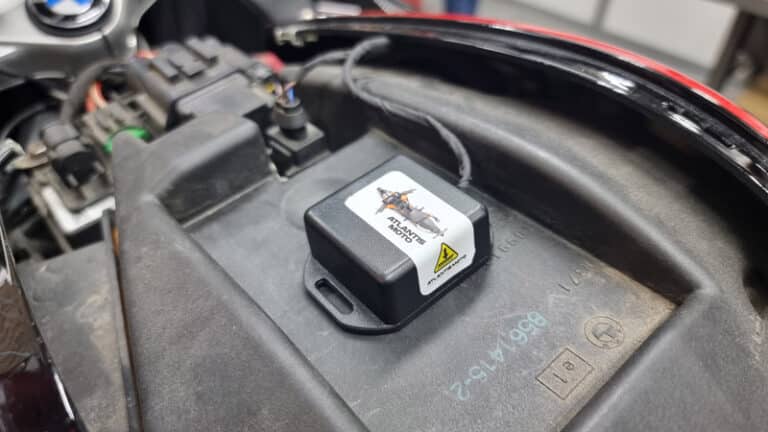
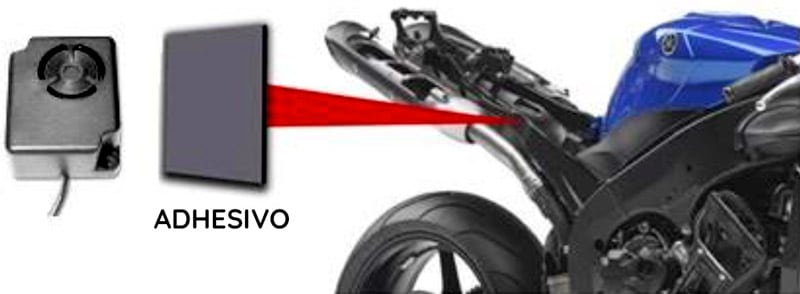
Place the fall detection module taking into account the following instructions:
· Fix it firmly to the chassis or to a fixed part of the motorcycle (with adhesive, flanges or screws)
· With the motorcycle straight, once the module is installed, the image of the motorcycle that appears on the adhesive must coincide with the same position and direction your motorcycle is facing.
60º Sensor
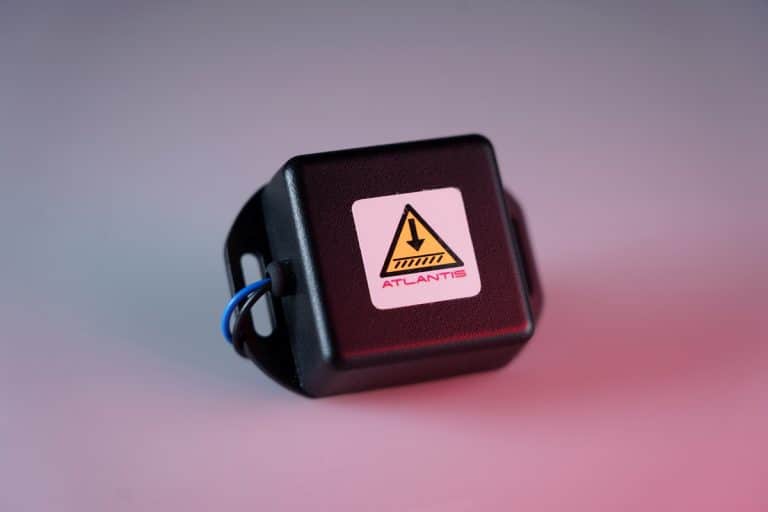
Place the fall detection module taking into account the following instructions:
· Fix it firmly to the chassis or to a fixed part of the motorcycle (with adhesive, zip ties or screws)
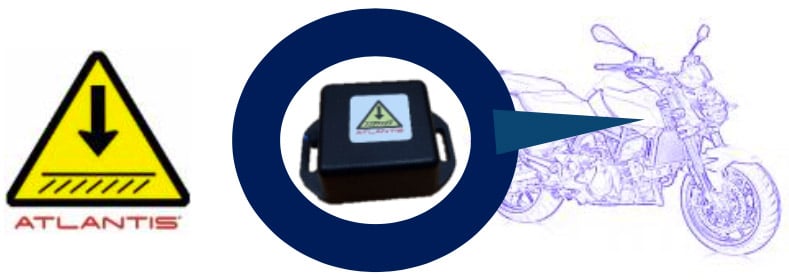
. With the motorcycle upright, the arrow that appears on the module sticker must be pointing towards the floor
Are you going to install any more accessories?
Immobilizer Installation
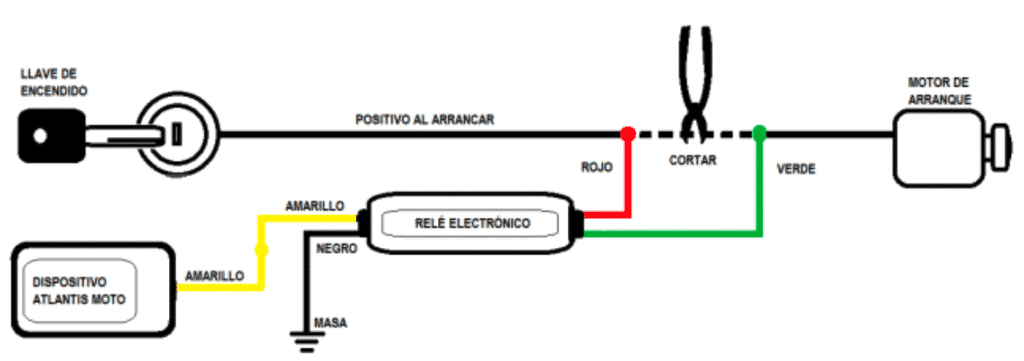
The immobilization of the motorcycle must be carried out by interrupting the activation signal of the starter motor. This signal must be positive. For this we will use an electronic relay. The connections must be made following the following assembly diagram:
Before cutting any cables from the motorcycle's starting system, consult your Workshop. Cutting or modifying the electrical installation of your motorcycle's engine may result in the loss of the manufacturer's official warranty. Atlantis MOTO will not be responsible for any claim by the user regarding engine outages or modifications to the motorcycle's engine management or starting system.
- Yellow Cable of the electronic relay: connect with the yellow cable of your Atlantis Moto MAX
- Black Cable of the electronic relay: Connect to the negative terminal of the battery
Locate the positive signal cable that activates the motorcycle’s starter motor when pressed and cut it.
- Red cable of the electronic relay: Connect with the end of the cable that, once cut, gives a positive signal when you press the start button.
- Green cable of the electronic relay: Connect with the end of the cable that, once cut, does not give any signal when you press the start button.
Are you going to install any more accessories?
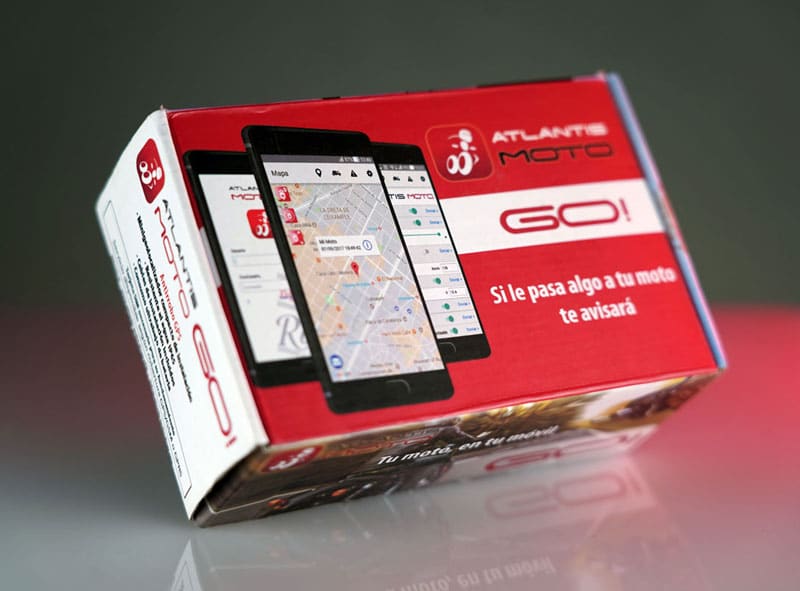
Installation Atlantis MOTO GO!
IMPORTANTE: Before installing the device, you will need to activate it on your mobile phone so that you can test it during installation.
To activate it, create your account and register your device in the AtlantisMOTO APP 24h before installing it.
Start the registration by clicking on “New user” and enter the IMEI number, which you will find in the box of your AtlantisMOTO.
Find a location to hide your Atlantis MOTO GO!
Before starting the installation of your Atlantis Moto GO!, you will need to find a location for your Atlantis Moto GO! In the image below, the arrows indicate possible locations for your Atlantis Moto GO!

Please note that the device has built-in GPS and GSM antennas. Decide the location of the device according to the following indications:
- The unlabelled side must not be covered by any metal parts.
- The unlabelled side must face the sky. The device can be tilted sideways.
- It is not recommended to install it upside down (with the unlabelled side facing the ground) as it decreases the quality of satellite reception and may show a greater error of the location of the motorbike.
- Do not place the device outdoors or where it can be flooded.
- Do not place the device close to control units or management units (keep it at least 10 cm away).
- Do not leave the device loose without any type of fastening (adhesive and/or flanges).
- If possible, it is recommended that the device is fixed on a part of the chassis.
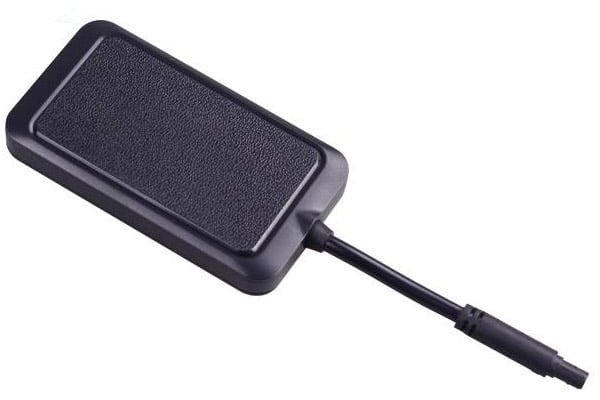
This side of the device must face the sky and must not be covered by any metal parts.
Once you are clear about the final location of your Atlantis MOTO you will need to make three basic connections. You will need a multimeter (tester) to check the connections.
Do not carry out the checks with a test lamp or a bulb tester, as this can lead to serious errors in the electrical installation of your motorbike.
This is the wiring diagram of your Atlantis MOTO GO!
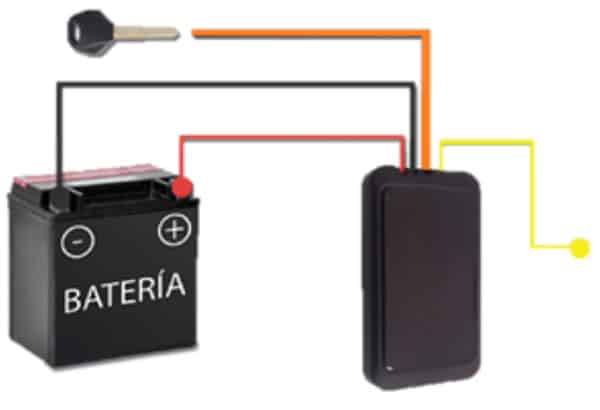
- The cable lengths supplied are based on the average length for installation on any motorbike.
- You can cut or lengthen the cables as required for your installation.
- Solder and insulate all connections you make.
- Use a sleeve similar to your bike’s wiring holster to hide your Atlantis Moto GO! installation.
- Use terminals to connect the cables to the battery terminals.
- RED Wire - This wire must be connected to direct positive
The direct positive signal is one that remains constant at all times.
Do not cut or remove the pre-installed fuse holder on the red wire.
- BLACK wire - This wire must be connected to negative
- ORANGE wire - This wire must be connected to a positive after contact.
The positive contact is usually found on one of the two wires from the accessory sockets on your bike. It can also be found in one of the two wires of the rear position light bulb or rear number plate holder.
¡WARNING! Once all electrical connections have been made, you must activate the internal backup battery. To do this, remove the top cover and turn the battery management switch to the ON position.
Are you going to install any accessories?
Which accessory are you going to install?
Siren Installation

The siren connects to your Atlantis Moto GO! system via two wires. You can cut or lengthen the wires as needed for your installation.
- BLACK Siren Cable: Connects to the yellow cable of your Atlantis Moto GO! system.
- RED siren wire: Connects to the red cable of your Atlantis Moto GO! system.
Position the siren taking into account the following points:
· Keep it as far away as possible from the Atlantis Moto GO system!
· Avoid any contact with water.
· Do not leave the device loose without any kind of fastening (adhesive and/or flanges).

Are you going to install any further accessories?
Immobiliser Installation
The motorbike must be immobilised by interrupting the starter motor activation signal. This signal must be positive. An electronic relay is used for this purpose. The connections must be made according to the following assembly diagram:

Before cutting any wiring on your motorbike's ignition system, consult your workshop. Cutting or modifying the electrical installation of your motorbike's engine may result in the loss of the official manufacturer's warranty. Atlantis MOTO will not be held responsible for any claims by the user concerning engine cuts or modifications to the engine management or starting system of the motorbike.
- Yellow wire of the electronic relay: connect to the yellow wire of your Atlantis Moto GO!
- Black wire of the electronic relay: Connect to the negative terminal of the battery.
Locate the positive signal cable that activates the starter motor of the motorbike when pressed and cut it.
- Red wire of the electronic relay: Connect to the end of the cable which, once cut, gives a positive signal when the starter button is pressed.
- Green wire of the electronic relay: Connect to the end of the cable which, once cut, does not give any signal when the start button is pressed.
Are you going to install any more accessories?
App download
To connect with your motorcycle you will need the Atlantis MOTO App. The App is available for iOS and Android from the following links:
Registration and configuration of the App
With the AtlantisMOTO App downloaded to your phone, access the App to register your device and create your user.
